DVD Package design

Over past few days, i have been designing some imagery to use for the packaging design. I wanted something that could successfully carry on the emotionless theme of the piece ow work. After some struggle i used a stock texture to make an artistic skin like texture to cover the entire case. And add nothing to the design but its title which is going to be "This Is Life"

Here are some secondary designs i produced. The first is some personal illustration i have been working on, and for the sake of it, tried it in a design for the DVD Package.


This design was litrely using material from the shoot and research folder. Using visuals that matched up to the video.


Below is the design I decided to go with. The package has the correct mood and colour tone to suit the video. Font is very bold and bulky, yet symmetrical, camouflaged and uniform to the background texture.

Promotion: Online Event premier


For one time only I shall be holding an event premier on the 7th June for all to see the film. The plan is to upload it to vimeo, and make the file public at 8pm for anyone to watch. The event shall be open to everyone and is only going to be available on a temporary schedule. As i will remove it for private showings elsewhere in the future such as a relevant film festival

Screen Yorkshire Cast and crew event


The other day i attended my first ever networking even. As punishing this sounds to my development, i am very proud to say that i didn't go quiet and waste the event which i anticipated, but i actually flourished, talked to many strangers, exchanged cards and got noticed by new people which is a real confidence booster! I even run out of cards!! A will definitely be attending the next one, and any others that come up! Aslong as they dont clash with the dreaded part time job which always seems to be the case!! hmmm

Finnishing off - File organisation and what not

The soundtrack is in, the sound foley is synced, the footage is composited and graded. I have an export ready to show and gain feedback. Overall seems to be completed and ready to move into the product promotion stage of the project now. I shall gain any relevant feedback from peers and close friends to gain any possible knowledge of a mistake or tweak that will be worthy of applying. Other than that its time to reflect, promote and produce for the end of year show and distribution onto the web.

First of all, I am going to sort out my files and organise them into some kind of order. Then possibly move onto some product design like a DVD cover.

Sound Foley - Adding some spicy sounds

There are a few moments in the footage that i believe will benefit from sound foley being added. The the contradiction of it being a visual piece, a few actions need to be exaggerated by words. I have collated a list of sounds that will be needed in the film. Its short and sweet, but important.


Swoosh sound - This is when the male character delivers the first significant action of the video. He snatches the flower from the hand of the woman


Impact sound - Although the weight of a flower would not provide any obvious sound when hitting the ground, i wish to exaggerate this pinnacle moment with an over the top impact sound to signify its meaning of rejection.

I will add these tonight to complete the film, and will export the video for some feedack

Flower Shoot

Today was the day i finally wrapped the shoot for my FMP. It has been the longest ongoing open shoot i have been involved in to date. Up to almost 2 months, not that you would realise by the amount of footage shot. Despite all other projects intercepting between the open process of this short film of mine, i have now comfortably got int under control. I did start to worry recently, but its now pretty much in the bag. I have just finished adding the footage caught of the flower into the project. It now looks like a complete story. Here is a quick shot of the flower from the footage taken today:


Next up is adding the soundtrack which is completed! Yey and it sounds pretty sweet. Am pleased with what patrick has done. Very emotive.

Compositing Breakdown


To elaborate further on my compositing journey i have constructed some video that helps demonstrate the changes in the process. This video goes through a breakdown of the compositing stages. It starts with applying the two layers and then garbage masking the green screen layer. Then moves onto keying and correcting of the key. Finally it demonstrates the before and after of the grading process and application of the 2.35 aspect ratio and animation of the two layers. Finally shows the end result both in breakdown stages and the final result.

Here is the video:

Networking Online

Networking

I am set up on various networks that are relevant to my practice. These networks are already proving valuable as they are slowly starting to show signs of job offers. I have been given interviews, but have not been able to attend, plus i am not available due to the course. But it is a great eye opener to realise that your capable to achieve something like that. Doubt resides and confidence has grown.

Here are some links to my network profiles:


Fish Food - The Shoot


This shoot was the ultimate in lightweight production. Consisting of a crew of three and a cast of two, we must have appeared to be a set of kids messing around a pond to any outsider watching in. For what the production needed this was more than acheivable, but not confortable by any means. A couple of extra hands would have been most beneficial at times, regardless we did it, and quite successfully to add to that note.

The place was pretty much in the middle of nowhere, but somehow still managed to get dog walkers and joggers coming now and again. This always occurred at the most inconvenient of times given the fact that we only had specific times to shoot thanks to the weather. As i had already foreseen in the reccy, the typical British weather was true to its reputation. One second it would be beaming with glorious sunshine, then suddenly give way for winds and rain showers. Not the best environment for continuity and light control.

Besides those various issues, we managed to squeeze the time out of the overcast weather to complete the shoot, although a little over schedule, the actors did really well putting up with the wait for weather and other issues regarding props. James managed to somehow direct and operate the boom while recording, too many jobs for one man, but he pulled it off so hats off to him for that.

Working with james on the Fish Food shoot was a solid reminder that his direction is upmost professional, and provides an additional boost of confidence to succeed in my role through that trust. The place in terms of cinematography was pretty much all self art directed. Lighting was only as controllable as waiting for the right amount of cloud cover, which I held to throughout the day to ensure the best possible continuity of the footage. I went with the 50mm lens to try cutting out as much of the sky as possible. Although something i have started to notice with the depth of the 50mm is it has a tendency to make the subject look like a studio green screen composite. When in an external situation, the depth is so shallow that the background pretty much blurs into a solid texture at times, specifically when the surrounding area is all grass and trees. This is not an issue at this time but something to consider when selecting lenses.

Composite Editing

The project is now under real construction. I have spent most of the day construction the composition from the green screen footage and the background footage. The project is now starting to take some visual shape, a product can be seen through the hoards of footage. After sorting the footage into designated locations amongst the project files, its initially a matter of dropping the background footage behind the keyed green footage. This process can be seen below.

Once all the footage has been composited, i then went through them again to colour correct, mainly to balance the difference in warmth, or add any desired changes to the grade. Third stop was to do any relevant animation of the footage to match the crane movement in the green footage. Such as the opening shot the crane pans down to reveal mike stood in the scene. This was achieved by simply animating the background layer in time with the movement of the cranes movement

Visuals for these process:


Next in line is to shoot the footage for the flower hitting the ground, i will shoot this after James's Fish Food production is in the can.

Fish Food - briefing and location reccy

Had a good solid meeting with the cast and crew today for the Fish Food production. Went over some key issues in the script, particularly the struggle sequence where one of the actors will have to wrestle the other to the ground contain, struggle and then stab the other actor until dead. Having recently done the action packed shooting on Top Rock with dance sequences So theory would hopefully apply to a fight sequence And should be similar in the approach of placing the camera and camera movement.

We took a trip the the location to block out some of the more difficult shots. Again like top rock, this opportunity provides at the very least an ice breaker, but allows me to become knowledgeable on any problems or key shots that will be in benefit to the shoot dates.

One issue i am already concerned about is the constantly changing UK weather as the entire shoot is outdoors. So unfortunately the weather is out of the circle of control. Everything else controllable is ready to go for the shoot.

Soundtrack: In control (Hopefully)

Home Studio


After passing a very rough copy of my film over to Patrick just over a week ago, he has advised that the soundtrack is coming along nicely. i am yet to hear the track personally and will be making a date of it over the next few days, but my confidence resides well with him. I can comfortably finnish the film over the next few week and slap the soundtrack on any point. I intend on giving him a final version of the film to tweak the score in the next week. Things may become slightly lost again with james's shoot looming ever so closer.

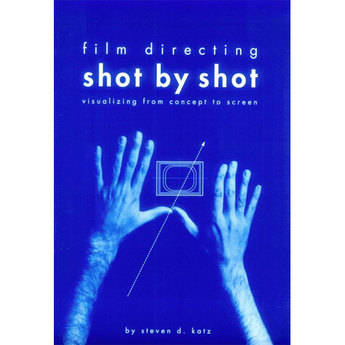
Book: Shot By Shot


Shot by Shot is a step back from the filmmaker's lens. This book allows me to analyse and gain an understanding of how preplanning shots and putting them together can feed into my role as a DOP/ Camera op. By gaining an understanding of roles that are not directly in my control, I can foresee any input that I should provide in these vital yet sometimes overlooked essentials in film making. The author Katz explores the graphic design of a shot, presenting alternate examples of shot layout side by side. The author encourages seeing shots on the storyboard and how they play together, seeing the movie as static pictures before any film is spent, and this is something I need to pay close attention to in order to achieve the skill of providing the directors vision in camera. As he explains: "look at each sequence as a complete statement. Developing an intuitive sense of the overall perceptual effect of a sequence is one of the skills necessary for visualization." (pp 160) He offers traditional process but encourages experimental methods where appropriate. I was pointed toward the book from reading a similar book from the same author about cameras. Having read other film preproduction books this has been the best so far, although quite traditional in some sense.

Clarence Dock - failure and recovery

Yesterday i went to clarence dock to shoot the composite footage. To my frustration, it took me 15 minutes of driving round to find a parking space. When i find a space, i walk to the location at clarence dock to find that the sun does not cast any light or defied shadow in the area. As frustrating as this was, it only allowed me to make a decision that I have been fluctuating over for weeks now. That is to shoot the footage at night when the lights of the surrounding buildings light the area. However i have returned tonight and was a tad more successful.

The lighting of the dock allowed for some very visually pleasing footage, i went through each frame of my reference sheet lining up james in the position of the actor, then removing him while the camera rolled. Next step is to start compositing the subjects onto the footage and match colour grades. But for now, here is some stills of the footage I have shot tonight:


Back on the FMP Bandwagon.

Despite Graemes shoot, i have pretty much been redundant of activity with the progress of my personal FMP. Not that this redundancy has been a waste, I have been working on other projects as part of my FMP schedule. And with consideration to PPD, activity levels have been cut throat with the likes of commercial work and competitions.

With the exception to James's soon planned shoot for Fish Food, i have a month to complete and ready my project for submission, distribution and any other relevant plans that may occur.

The next step on my project is to plan the sequencing for the composite footage. As previously mentioned, I will be shooting this footage at clarence dock in Leeds centre. Before an attempt is made, i have constructed a shot sheet using stills from my green screen footage to get an understanding on composition when on location. To do this i shall be taking a subject with me to get the framing visually accurate, using the same lenses as in the green screen shoot and placing the actor in the same place will allow for a true to life result.


This document will act as a visual aid to place hold an actor in frame, when the shot looks like an accurate duplication to these in the document, i will then remove the subject and record the footage. I will attend later today and shoot the footage when the sun is low in the sky so its casting similar shadows to the lights on the green screen footage.

Doritos Edit - Everybodys Favourite

Well this was truley a shit polishing job. With the lack of attendance from my actor, fast inititave was only going to deliver substantial footage at the best. However, i do believe i may have managed to plant som seeds and grow the roses of post success from the ashes of production failure.

Reflections on the project are its got potential to supply footage into a showreel, yet i seriously doubt it will make any sucess in the doritos competition. But hey, i gave it a shot, and its the taking part that counts, and not the 200K prize :'''(

Here is the Advert "Everybody's Favourite" in all its glory:


LOL

Doritos Shoot - Everybodys Favorite

Shot the commercial today for my doritos script "everybody's Favorite" is now the title for the video. And today was a DISASTER. My leading male decided to sleep in and not bother telling me. So i had to improvise dramatically with switching cast members around and literally re scripting the entire piece. My pre planning was pretty much a waste. However on the bright side, one of the elderly ladies that were playing the smaller part decided to bring along her husband, who by chance had some experience in extra work. At this point i thought great! lets put the elderly couple in place of the young couple. Now at this point if your reading this, your not going to have a clue what im talking about. AND TO MAKE IT WORSE, I CAN NOT FIND THE ORIGINAL SCRIPT ANYWHERE. All i have is this half complete storyboard.

Top rock - The Second Shoot

Book: The Camera Assistants Manual


Now i really do struggle to read normally, butDavid Elkins has written this awesome easy to follow advice about how to act on set, what a camera assistant is expected to do, and all the tips and tricks that will make a first or second camera assistant ready to advance to the next level. Everytime i read this book i learn something new like skill sets of a 1st or 2nd AC Camera Assistant. Before i didn't realise that the clapper and loader was known as the 2nd AC.

This super book covers the basics that i need to know about cinematography, how to maintain many types camera but not a 7D =( how to transport a camera, how to troubleshoot common problems that arise on set, and even advice about interviewing for the job, which should come in very handy soon. The new edition has also been updated to include new forms, checklists, tables, and illustrations that will be pretty handy as i can recreate them and use them on set in the future

Russian Roulette - Finished Edit

Russian Roulette

This is the final edit all cut solo by James Wall. Hats off to him, because i couldn't stomach what he had to endure to get it complete.

Working as the DOP on this piece titled "Russian Roulette" allowed me to step outside my comfort zones due to the fashion based theme, as it is something that i would strive to avoid under must circumstances. The short commercial type video is based around a line of accessories created by fashion designer Toni Thornton.


The footage was shot at 50fps, using the Canon 7D as all things should be :)

The art direction made my job very easy on set, the only downside was the location. A stunning location such as an old abandoned warehouse with some decaying wood would have added such rich detail to the existing autumn colour palette present in the footage and video effects.

Fetching yarn - Sting Production


As a request from Greame, he has an idea for a sting to go with his new found production name "Fetching Yarn" You can check out his website Here Its looking very slick indeed. Anyway i digress, Greame wants a sting producing so we set about doing a test on what he is looking for. This is only a place holder, but the final piece will look something like this above. for confidential reason, i have not uploaded the video as it is not really worth doing anyway, and is not my work to be distributing.

Moo.com Arrives - Business Cards


My cards arrived today, and they are super slick. I have seen many products from moo previously through other people, but for some reason my cards just look and feel so much richer than any i have ever come across. I am very pleased with the print quality, and am now ready to go socially network my moo box to the bone. Oh and i got this super duper contraption for the cards to go into! This is something very special!


Its a super sleek card dispenser, very lightweight and very thin. It uses the button that you can see to slide cards out of a slot in the side, and the cards are pressure loaded to pop up as one leaves. Its super!!! Now that is professional development

Top Rock Rushes - The Log Process

The log Process has changed somewhat since canon teamed up with apple to release a plug in for the Final Cut Log and transfer menu. Although it takes a little more time that just copying the video files from the CF card, its far more time effective in the end. The plugin converts the files into Prores format from the H264 they natively store as on the Canon 7D. Using this plugin and going through this process effectively allows you to edit smoothly with no issues that the native format can sometimes produce.


I found the Plugin posed on the Cinema5D blog my go too place for all things HDSLR. The plugin process works exavtaly the same as the log and transfer menu in Final Cut so there was no issue learning a new interface, its just a matter of giving it some time to convert the footage which is a pain in the butt, but is well worth it in the end

on a less techie geeky note, the footage is looking superb, i only wish i could show you ome stills, but im not allowed due to that whole film festival premier crap! The second its online i will be selling it to he world!

I have Website

After my business card venture i decided am going to get rid of that horrible flash website on wix. And build a new super website. Little to my knowledge, blogger actually alows individual pages! And that exited me very much. I went searching for a template with this new found Knowledge knowing that i can tap into my old html coding past to edit it to my desire. I found a suitable template to work from at btemplates.com a great resource if your no good with web scripting.


The site is still under constriction but will be soon up and running. Please check My Website for any cool updates and changes

Heres a screen grab of the Showreel page for documentation reasons:

Business Card Design:

I have been working on my business card today as i seriously need to get my ass networking fast! I have designed these little beauties below. I decided to go for a vertical design to literally catch attention that little bit more, and avoid falling into the stereotypical horizontal businessman type card with its horrid type face.


Am going to send them off to moo right now and get using them!!! Better late than never aye! But seriously the design is something i constructed in after effects, going for that ever so cliche "boke" visual to relate to my new found cinematography role.

Doritos Reccy

I went on a reccy down to a pub called the aire of the dog today. I called the manager Simon Robinson previously and explained my plan to shoot a commercial for the doritos competition. He invited me down to chat and discuss possible areas to shoot.

Simon was a really down to earth gut who had no problem closing off a section of the pub for a while. So i had landed on my feet here, am lookign foward to shooting there, and this is why! Check out these photos, the place needs no art direction what so ever.


Top Rock - The first shoot


Top rock shoot

The day started off slow, we had move all the equipment in and was set up a little earlier than the cast were ready, or in some cases not here yet. This was no problem as i managed to snek out for a beautiful bacon sandwich from the local bakery in the area, and i washed it down with a delicious ice cold oranje juice. When i returned, things were getting under way. The makeup artist was applying what i like to call "film faces" to the actors. This produces nice matted textures to avoid horrid shine in camera.

Once the time came for the first sequence, i was ready from pre planning the angles that would work to introduce this scene. The first shot is of Guy running up the stairs. I did shoot all the relevant angles to be safe, but i was convinced the shot from above looking down looked the most convincing, and cinematic. Once this forst shot was out of the way, it was then onto the first dialogue sequence. Fro there we just took off, and was well on our way

Around halfway through the shoot, myself and everyone else was becoming concerned about the pace we were shooting considering the deadline of around 4.30pm, especially with the higspeed footage still to capture, and the dance sequence.


Towards the end of the day, we managed to squeeze what we needed into the day and wrap convinced that we had what we needed. Graeme seemed pleased with the effort everyone made in the end for this to come together as a success. Working with Graeme is something i have done many times now and have previously felt very comfortable under his direction. With this shoot i couldn't help but feel that there was something missing from before, maybe it was down to nerves, but i felt slightly lost at times. Maybe it was a slight lack of involvement form myself in preproduction. However, together, the crew pulled it off, and pretty dam perfectly as well. I shall look forward to seeing the rushes! God bless the Canon 7D

Website Development


Free website - Wix.com

Top Rock - Location Reccy Pt II

This is a collection of clips from various locations that we checked out today.
There are:

Old Hallway
Cellar
Wall
Bus stop


These locations are what Graeme is planning on using for he shoot. Although these are still very much subject to change. In terms of my planning of angles and movement, i cant foresee any issues with these proposed locations

Top Rock - Dance Reccy

Dance reccy @ SLP College

As planned, i got the opportunity to look around the location, but more importantly got to plan the strategy of shooting a choreographed dance sequence. The experience was great, got to meet Guy Black, the star cast male playing the main part. He has got some crazy moves, and can do backflips, which is very impressive seeing it done infront of you, but i diverse. Together with Guy, we ran through a dance routine to a simular tempo track that will be used in the film. I worked out whats the best techniques to shoot this while he would be preforming the routine. The experience both gave me ease of mind, but in a different light allowed to build relationships with the cast before the shoot, and by "breaking the ice" the shoot in theory will feel that little bit more comfortable, without awkward silences. God i dont like those times!

Toprock Dance Reccy:


All the time i was there i could not help but think of the film billy elliot, as much as it has no real connection other than dancing, and a possible working class vibe, i love this film. Such a fantastic feel good story. And some of the cinematography is outstanding to say its filmed in the north east of working class england.

Development Crit

The crit today was a chance to show some real progress with the project. I previewed the film in its silent uncomposited state. Although i have a solid plan of action with much spare time, i was still handed some great information that i had not considered before. The issue of distribution, and what was my plan? Well after thinking about it since this morning, i am going to release in on the web. Build up some hype around the film towards the end of the college year and obviously have it on show at the end of year industry event.

My plans going forward are to get my soundtrack genius to score a pice of music for the film. Now that it has a rough edit, he can start to at least get a feel for what he will be producing. In addition, i need to plan for the composite footage to be shot at clarence dock. Sitll debating on if i should shoot at dusk or night! Need to go down and check it out at those times to make a real decision. One important thing that i havent done and to be honest keeps slipping out of mind, is to shoot the flower on high spped dropping to the ground.

Other than that, its time to start getting involved in some other projects as DOP and camera operator, give the 7D A GOOD OLD WORKOUT!

Top Rock - Pre Production Discussion

This evening i spent some time with Graeme. In a nutshell we read through the script of "Top Rock" in search of any outstanding or difficult shots that would need extra care and attention. By this i dont mean standard dialogue sequence shots, but some of the more visual movements that may be needed to achieve a certain feel or effect in the film. For example one scene is set at a bus stop, and there is a fair amount of physical movement combined with dialogue. The challenge was to consider the most effective way to cut shots or move the camera to both feel natural and unnoticeable, but achieve the relevant feel to the action filled sequence.

I tackled this issue with the sketching of some simple diagrams of actor movement and camera angle/movement. These allow to premeditate the sequence, and as i act it out in my mind, i can visually apply it to the location on the day of the shoot.

A second concern of mine is the dance sequence. I am aware that that Graeme wants more of a montage type feel to this section of the film, however getting it to make sense and flow naturally is something that i will have to test in the coming reccys that Graeme has planned with the cast.

First Edit

All the rushes have been organised and filed into relevant categories. The main division is the footage of the male and the footage of the female parts. I took the edit straight into Adobe after effects. This allows me to tweak the cuts as and when i want after they keying process has been applied. If i was to do an edit in final cut, i would have no give with the cuts, and at such an early stage this is crucial to keep open. The only downside is the fact i have to ram preview everytime i wish to playback. But hey, am use to it!


The first process was to lay down a rough cut in sequence to my storyboard and see how the comparison feels. Naturally with most editing jobs i have done before, the edit will differ from the storyboard slightly towards the end.


Once this rough cut was complete, i went ahead and started to key the green onto a white background. The white background allowed me to achieve the best key in the edges of the footage, as the footage was pretty much black. At this stage, the edit is now ready to go into compositing. Just need to shoot the footage to composite the actors onto. As previously mentioned that will be at clarence dock. More on that to follow with a bit of luck

Greenscreen Shoot - Nice and easy


The Shoot was n absolute breeze, once all the exposure was set after the lighting of the green screen it was a flawless shoot.
Everything went perfectly, as there was no real continuity issues, i ran through the shoot in story order to keep the flow and feel for the actors.

Both the actors preformed great, couldn't have asked any better for the amount of detail they had to feed from. There was one issue regarding the actors that i would like to change now, but it is so un important its barley worth mentioning, but or a critical perspective i was thinking maybe it looks odd how Mike "the male actor" looks a little bazar with dreadlocks and tunnels then shoved into a suit! wasn't what i was looking for, but tas previously mentioned getting a suitable male for the part proved to be a nightmare.


This shoot was the second time using the 7D. Regardless of doing tests on green screen with the camera, i was still very sceptical and worried that the footage would struggle to key in post. Using the camera for the second time on track and jib was much easier that the first time when shooting the fashion advertisement. The weight difference in comparison to the sony EX camera is astonishing. Some say the weight acts as a smoothing aid, however i noticed no real difference between the 7D and the Sony regarding the smoothness of track or jib shots.


The shoot seemed to be very smooth, taking a total time of aprox 90 Minutes to actually shoot the footage, i believe everyone involved had a nice enjoyable experience from it, and hopefully will have something visually remarkable to take away from it at the end of the project.

Next in line is shooting the high speed of the flower, and of course looking through the rushes and the edit!

The final round up

Today i have bided my time and gone over a checklist of everything i need to have prepared for the shoot. This is everything from actors to what im going to have for dinner.

To confirm equipment i called matt to assure the equipment will be ready for the shoot first thing:

The College Kit List:


Track
Dolly
Jib
Tripod x 2
Monitor Stand
Lighting x 3 Kits
Greenscreen
Crossbar mount and stands
Plastic Board (For instant wind Effect)

Personal Kit List:

7D
50mm Lens
20mm Lens
Follow Focus Rig
Macbook
Usb Extension cable
Charger


Actions to reassure:

MAKING SURE THAT IAN HAD SCHEDULED FOR THE SEATS TO BE MOVED BACK IN THE THEATER.

Calling the actors one last time to make sure they were prepared and had everything they needed to complete the shoot.

All this has now been done and checked. I feel confident that the shoot will go smoothly. Time shall tell

Greenscreen - Down and dirty

Although i have done much reading from the previous books mentioned in the blog line, i found a nice little web article on all things greenscreen. Very insightful!


Down and Dirty Green Screen

by Walter Graff


NOTE: Your computer monitor is not a TV set. The gamma settings of your computer monitor are usually different than a TV set, hence some of the photos may look dark or not as good as they should. Use these photos only as a reference.

NOTE ADDED 11/2003: I have received many emails asking why folks just can't seem to do what I am doing here. All tell me they are trying this with less than stellar DV cameras. I will preface this article by saying if you are using an inexpensive, small CCD DV camera to do a chroma-key, you may be at a disadvantage. Larger 2/3 inch CCD systems have easier times with chroma-keys as do formats that are more robust in terms of signal quality. It's not that you can't do it with DV, it's just that it can be difficult to do more intricate keys with a consumer DV recorder. And the "digitalness" of a DV signal in post adds to the problem as it creates small boxes that represent pictures which means when trying to cut digital DV keys you can get what are called jagged edges that don't look smooth. On top of that the software and hardware configurations you use may also affect quality. There are a number of software plug-ins to help smooth out this problem.

Chroma-keying for television is one of the simplest effects one can do to enhance a production. I shot a direct marketing piece and needed to do a simple green screen for the spot and turned it into an article showing you how I accomplished it.

This was a shot of the talent in front of a green screen in a medium close-up speaking to camera. The first thing one needs for a chroma-key is a colored background material. I use green and blue as my two colors of choice for background. Green will present your talent as sharper when you look at them in-studio than blue as our eyes have a difficult time focusing on blue. That last sentence has noting to do with the quality of how the colors key, just how your eyes see the color and talent in the studio. That might be a factor when you are doing intricate rear screen work and you want to be able to distinguish things easier as you look at them in front of the screen, but it has little to do with the post-production process as either of the two colors will key well.

The material I am using in the still above was purchased for about $100 from a scenic supply shop. It is a pure hue of green sold as chroma-key material. You don't have to spend as much money though. A trip to a local sewing materials/fabric shop will offer you all sorts of blue and green solid fabrics that you can purchase to create the same effect. Very simply you want a solid color with good saturation (pure color).

It's more knowing how the post works than the actual shoot!

While lighting is important to a good key, the most important thing about shooting a chroma-key has nothing to do with what you do in the studio, but everything you do after the shoot. Hence, to understand how to shoot chroma-keys properly, you must understand the process of cutting a key. I'm not talking about what a textbook says on the subject, rather I'm talking about actually knowing the equipment used to cut the key and how it works. "Cutting the key" refers to the electronic process in pst where you actually put the background behind your subject. You can only learn this from doing it. Today most of you do your work on a non-linear editing system. Hence if you are shooting a chroma-key and you haven't played with the chroma key cutting abilities of your editing system first hand, then you are at a great disadvantage. Very simply knowing how to drive a car and how to get somewhere are two different things. If you have been shooting chroma-keys and have yet to see the final process and how it is accomplished, I strongly suggest you try it before you shoot your next key. Doing so will open up a world of understanding that all the articles in the world can not explain. Chroma-keys are about subtleties and cutting a perfect key can only be completely understood after you've played with the chroma-key cutting controls yourself.

The first thing I consider when shooting a chroma-key is how much area of a colored background I need. In this case I was shooting a small area so I stretched a green material with auto-poles and some spring clamps enough to cover that area. There is no need lighting a 20 foot chroma-key if you're only using 5 feet. What is important is that all areas around your talent are evenly lit. I make sure that any wrinkles near the area where the key is to take place are at a minimum. I don't need to have a pristine ironed background but one that is relatively clean of wrinkles. The only way I know what is acceptable in this case is because as I just mentioned, I have actually done the post-process and I know the intricacies of keys and what I can get always with. Wrinkles are not your friend.

The Green Monster!

I consider two elements when lighting a screen. One of the most important considerations is maintaining the value of the chroma key color. In other words, taking a green background and lighting it with a whole lot of light effectively making it look like a washed out green is not the way to light a screen. Rather all I am trying to do is take the color and enhance it with light so it reads evenly on camera. That means I actually don't need much light at all. In this case, all I needed to successful light my screen was two 600 watt open-face fixtures with 216 diffusion clipped to the front of each fixture for better light dispersion. The fixtures were placed equal distance from either side of the background. In this case they were about 15 feet from the screen. I normally light screens with less light than the talent. I will not tell you how many stops of light the difference is as I do not believe there is a universal formula. It's what works at the time. But I will say that when you light a person and screen properly the difference in the screen levels and the person usually turn up to be about the same with the person being anywhere form one stop over to one stop under the screens level. You can always have a screen that is a stop or more under as that will mean less reflection and potential problems.

The second consideration for a good key is smooth, even illumination. There are a number of ways of determining this. Looking through a darkened piece of glass (gaffer glass) or dark gel will help you see variables slightly better than your naked eye. A light meter will allow you to see variables across the front of a screen. A spot meter will do it too but requires some practice. A waveform monitor is the best method as it will show you how even your lighting is with no room for inaccuracy. The simplest method and the one I used here was to rely on the exposure zebras in the view finder. Irising up and down causes the zebras to glow giving me a sense of what part of the screen is brighter than the other. I can then adjust the lights so that when I apply the zebras again, I get a more even exposure. Once again, knowing what I can get way with from having first-hand knowledge of the keying process allowed me to realize how even my screen has to be. Was it 100% even in this case? No, but I know what level of evenness would cut properly in post from having experienced it in the past. Notice in the photo below that my screen isn't exactly even in terms of illumination, rather it's a bit darker over the talents left shoulder and gets a bit darker going down that side of his body. I knew that, but also knew from having experienced trying to cut many keys in the past that it's perfectly acceptable in this case. You would have to experiment to know what is acceptable to you.

Time for the talent! Link to talents web site.

So I've got my screen where it's going to do the trick and now I need to light the talent. Yes, I light my screen first, then turn it off and light my talent separately. Read on! Lighting green screens is actually about lighting two elements as if they had little to do with each other. In other words, when I light a green screen (could be blue too) I light the screen making sure it's properly illuminated, and then I light the talent, not for how he looks in front of the screen, but how he is going to look in the imaginary setting I'm going to put behind him. In order to do that properly, after I light the screen sufficiently, I turn it off and light the talent by him/herself.

I always try to make sure my talent is far enough from the screen so as not to allow any color from the screen to spill onto the talents skin potentially causing problems later in post. In hits case the talent is about 15 feet in front of the screen giving me plenty of separation. There is no hard rule but the more distance you can separate the talent from the screen the better chance you will not have problems of reflection, etc later.

Isn't that easier on the eyes?

Look at the photo above and the photo above that. Notice the difference? It's much easier to see how the talent is lit when the green screen is turned off. And since the two elements (screen and talent) have nothing to do with each other while shooting, I say turn off the screen so you can concentrate on your talent.


Key light for the talent

If I was to light my talent just to make him look good for the moment I'd be missing out on what is most important; the element that will fill-in my background once the key is applied in post. In other words I have to use my imagination now and pretend that the background element has been inserted and my talent is being seen in that 'set'. So imagine that I am going to have my talent in front of an exterior shot of a bridge on a bright hazy day. First I need to know what the background element looks like. In this case, I notice the sun coming from the distance to the right of the background element. So my first consideration for my talent is where the back light (if any is needed) will go. Did I actually say 'if any is needed'? Yes. Sometime long ago in a far away galaxy someone created the myth that in order for a green screen to work, you need to surround your talent with lots of back light. And through the years all sorts of other mystical stories were added such as 'lighting with orange gel', 'never using colors for back light., etc. While this may have been true in 1970 when keys were first invented, in years past new and more sophisticated equipment has made cutting keys easier. As far as I am concerned, the only determination as to what I use as a back light is what the final composite is going to be and what pleases my eye. And as for colors? As long as I don't use a green light on my talent (in this case because I have a green background), I can use any color I want.

Example of a final composite

Just another note about the term 'ratios'; I hear all sorts of folks talking about ratios of foreground to background with video chroma-keys I think they are trying to make a science out of something that isn't that difficult. The bottom line is that if your background and your foreground fall comfortably within the range of acceptable exposure (they will naturally if you light your green screen for hue and your talent as explained above), I don't think there are any rules to this ratio 'thing'. I do seem to light my screens slightly darker than talent but that is because I am trying to illuminate color, not create a bright screen. In other words, when I am done I have extenuated the green color, not made it a brighter shade of gray.

Remember, effectively your background and foreground are two different things. I may have a final product that will be my talent standing in front of a star field. What does a foreground background ratio have to do with that? Whatever works! My background needs to be illuminated so as to be even and represent the true hue of the color material I am using (blue or green), and my talent needs to be lit not for any relationship to the background color but to the background plate that is to be inserted later. If it was a star-field, I might light my talent a bit more from one side and depending on the darkness of the background, I might give him a kicker type back light, from one side or a 'down the middle' back light. It's all about personal taste, but simply surrounding a person with back light. is one of the first clues that he is not part of the background element in many keys I've seen that didn't look good.

In the composite shot above, I used a bridge shot (the East River Arch over Hellgate in Queens, NY) for this example although in the real commercial that was not the actual plate we used, but it works for the purposes of this demonstration. In fact, something interesting is demonstrated. Notice the sense of sun coming from the right side of the background image (the bridge shot). See how the back light on the same side of the talent helps to make him look more appealing when placed in front of the picture as if he is really standing in front of a bridge with the sun hitting his shoulder as it does the bridge?

Lighting diagram

So to recap what I said-

1. Light your screen for it's hue and not just to make it bright. It doesn't take much to make a screen glow evenly.

2. Light your screen as evenly as possible. (first hand experience trying to cut a key in post will make that skill more of a skill and less of a guess).

3. Make sure your talent is far enough from the screen as not to have any reflections on his cloths or face from the screen. Don't freak out over this. Many folks tell you that you need to be as far ways as possible form your screen. This is false. A properly illuminated screen will not reflect light like a mirror. See my DVD to understand this.

4. After lighting the screen, turn it off and light your talent.

5. Light your talent not to make him look good in the moment but as if he was standing in whatever the background plate is going to be. If he was standing in front of an underwater background, light for that. Example of fun effect: you could try taking a dish of water, aiming a light at it from a low side angle, making waves with your hands, and allowing the ripples to move across your talents face creating a water motif to his shot that might work well with the background.

6. Back lights are dependent on nothing more than taste and how they work into your background. In that water example you might have streams of light coming down from on side of the background plate as if we could see the beams of sunlight in the water. Whatever side that light is coming from, I might put a back light. from that angle. You can use gels for back-lights as long as they are not too similar to the color of your background. Sometimes hair is shiny to the point where the background color might reflect a bit. Try a color to help eliminate the color cast from the background. For example, a straw gel on blonde hair might help eliminate some of the green tinge if it's a problem.

7. Color on anything in front of the screen can be what you want it to be as long as it's not too near the hue of the background color. It's best to stay away form sky blue-type colors if you are using a blue chroma key material.

8. All these things mean so much less if you haven't experienced creating the actual effect at least once. If you have your own edit system, take some time to play with the chroma key controls and see what it takes to cut a clean key. That will give you a better understanding of the intricacies of shooting a chroma key. If not, visit your edit room and ask the editor to show you how it all works.

Fashion Shoot - Rushes

After looking at the rushes, my beliefs have come true, the footage looks great, the Canon 7D is a successful purchase and will be doing every production from now forth.

Here is some tasty screenshots of the footage =D


Fashion Shoot - Cam op/DOP

After a very shaky and emotional start, this production flowed very well indeed. I was very impressed at first glance of the footage when shooting, everyone was fairly easy to work with, and there was no real pressure when working other that wrapping before 4pm, which is always a nightmare when your using college space and its booked after you. On reflection of the shoot, i felt that as a team we have produced some real quality footage that will with some hope look like a nice completed piece once edited. The crane shots with the Canon 7D were superb, being so lightweight, it allowed to do movements that the Sony Ex wouldn't have dreamed of doing. Plus this was the first official shoot with the Canon 7D since getting it, so am looking forward to watching the rushes. For now, its good night! Heres some great pictures with curtsey of my wonderful Girlfriend Emma. Enjoy!